How To Fix NSIPS Secure Connection Failure
The Navy Standard Integrated Personnel System (NSIPS) is a critical platform for the U.S. Navy, offering service members access to personal and administrative information. However, users may encounter the “NSIPS Secure Connection Failed” error when attempting to access the platform. This error generally occurs due to SSL (Secure Socket Layer) issues, outdated certificates, or incompatible browser settings.
In this guide, we will walk through the steps to troubleshoot and resolve the NSIPS Secure Connection Failed error, ensuring secure access to the system.
Common Causes of NSIPS Secure Connection Failed
Before diving into the solutions, it is important to understand the reasons for the secure connection failure:
- Outdated Browser: An outdated browser might lack the latest security protocols, leading to SSL issues.
- Incompatible Settings: Some browser settings might block secure connections.
- Invalid Security Certificates: If your system lacks the proper certificates, secure connections may fail.
- Firewall or Antivirus Interference: Sometimes, overly aggressive security software can block secure connections.
- Incorrect Time and Date Settings: Discrepancies in your computer’s time and date can lead to certificate verification failures.
Method 1: Update Your Web Browser
An outdated browser may not support the latest security protocols required by NSIPS, causing the secure connection to fail.
Steps to Update Your Browser
- Open Your Browser’s Settings:
- For Chrome, click on the three dots in the upper-right corner and select Settings.
- For Firefox, click the hamburger menu (three lines) and go to Help > About Firefox.
- Check for Updates:
- In Google Chrome, go to Help > About Google Chrome, and it will automatically check for updates.
- In Firefox, it will check for updates under Help > About Firefox.

- Install Updates:
- If an update is available, download and install it. Afterward, restart your browser to apply the changes.
- Retry Accessing NSIPS:
- After updating your browser, try accessing NSIPS again to see if the error is resolved.
Method 2: Ensure Security Certificates Are Up-to-Date
NSIPS requires specific security certificates for a secure connection. If your computer doesn’t have these installed or updated, the connection may fail.
Steps to Install and Update Certificates
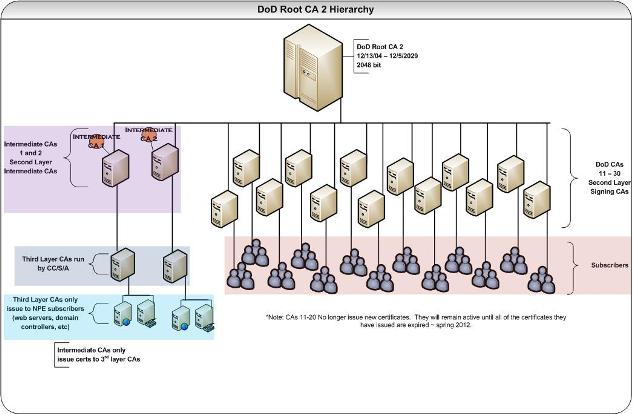
- Visit the DoD Root Certificates Website:
- Go to the official Department of Defense Root Certificates page to download the required certificates.
- Download the Certificates:
- Download the latest DoD Root and Intermediate Certificates for your system.
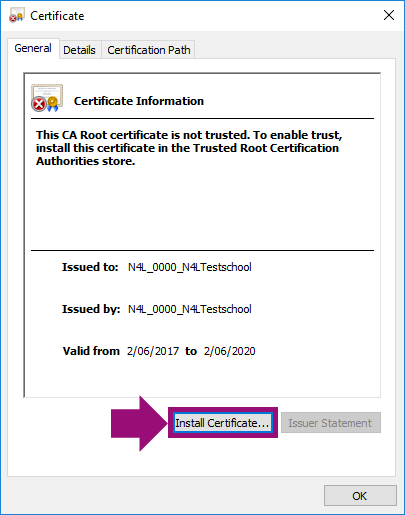
- Install the Certificates:
- After downloading, double-click the certificate file and follow the on-screen instructions to install it into the Trusted Root Certification Authorities.
- Restart Your Browser:
- After installing the certificates, restart your browser and try accessing NSIPS again.
Method 3: Adjust Browser Security Settings
In some cases, strict browser settings may block NSIPS’ secure connection. Modifying these settings may help resolve the issue.
Steps to Adjust Browser Settings
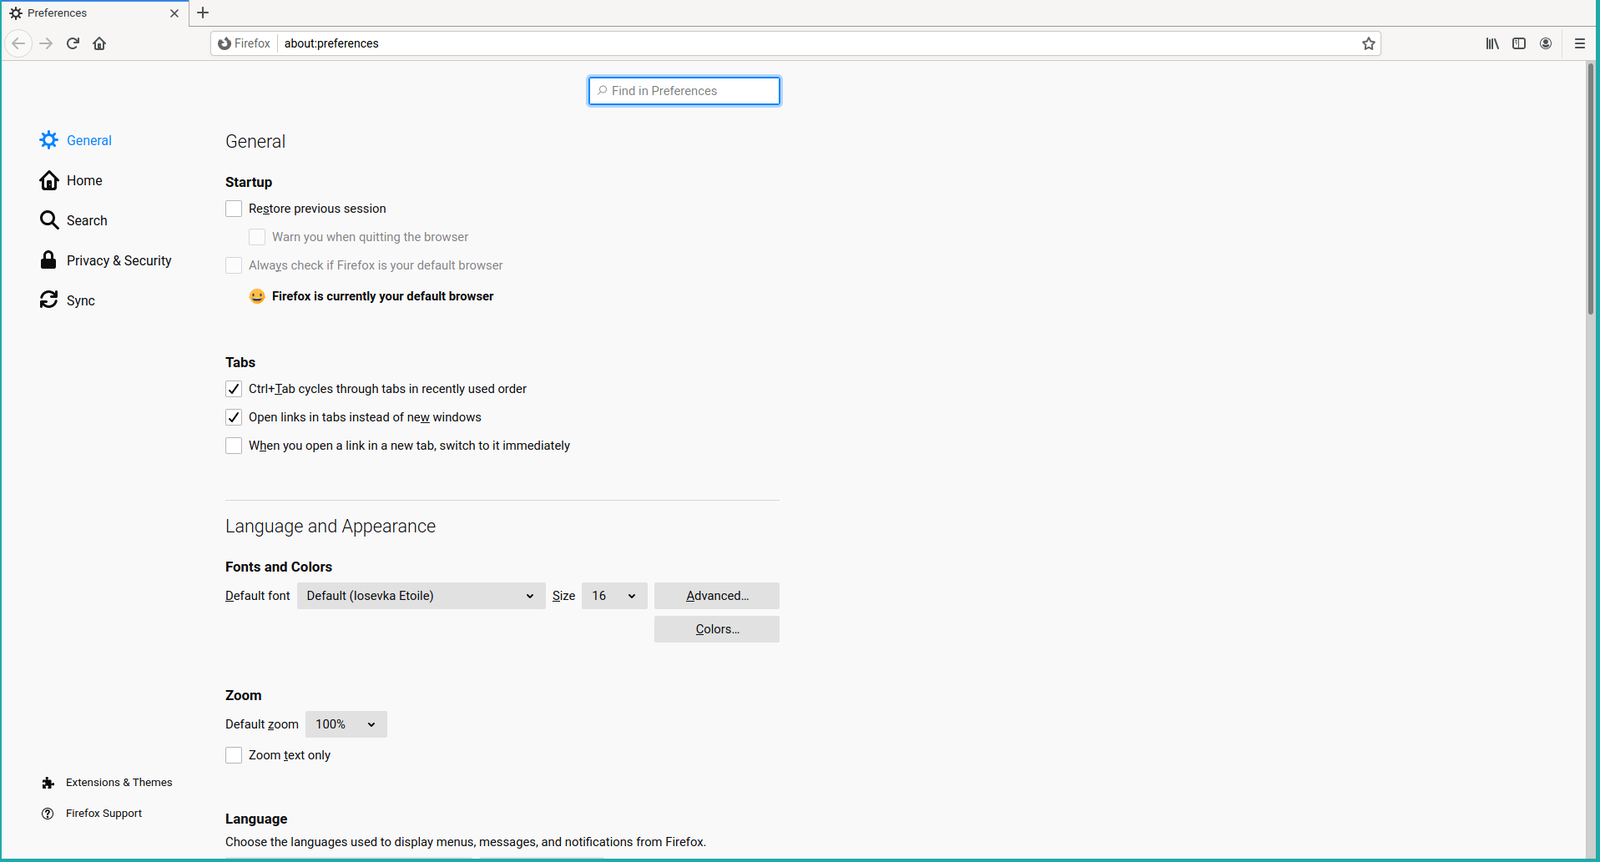
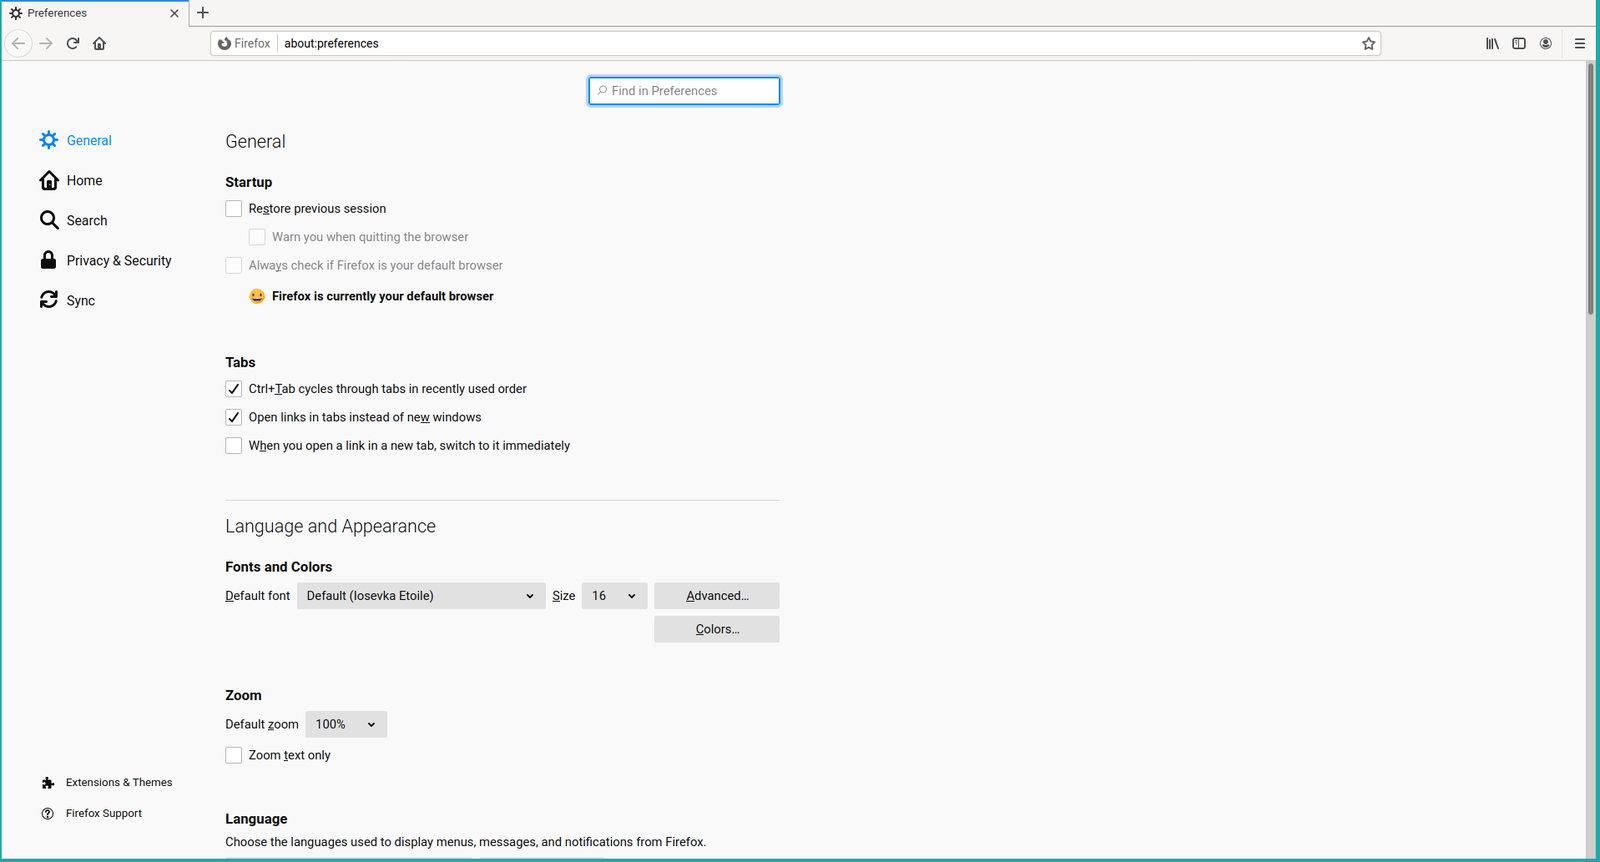
- Open Browser Settings:
- In Chrome, go to Settings > Privacy and Security.
- In Firefox, go to Settings > Privacy & Security.
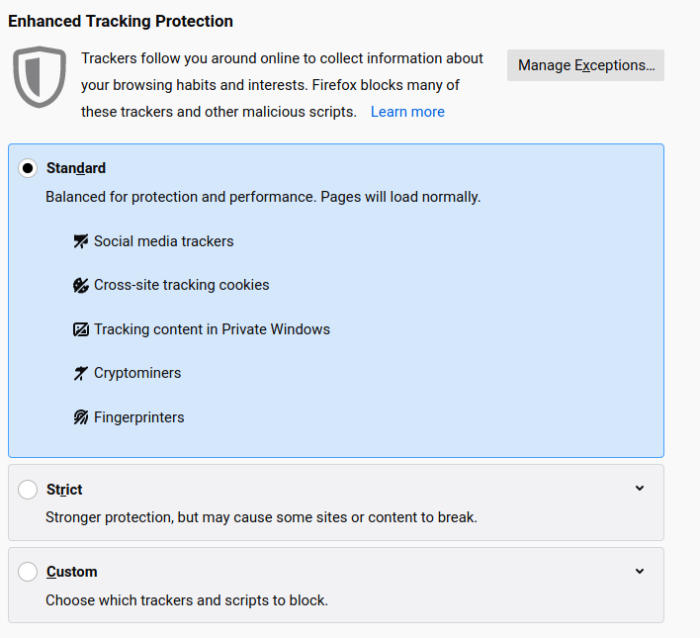
- Enable TLS 1.2 or Higher:
- Scroll down to the Advanced Security Settings.
- Ensure that TLS 1.2 or higher is enabled, as older versions may not be supported by NSIPS.
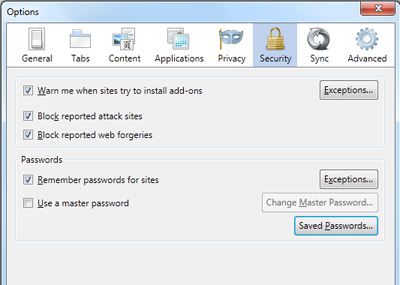
- Clear Browser Cache and Cookies:
- Sometimes, outdated or corrupted cache and cookies can interfere with secure connections.
- In Chrome, go to Privacy and Security > Clear Browsing Data and select Cookies and Cached Images.
- In Firefox, go to Privacy & Security > Cookies and Site Data and clear the data.
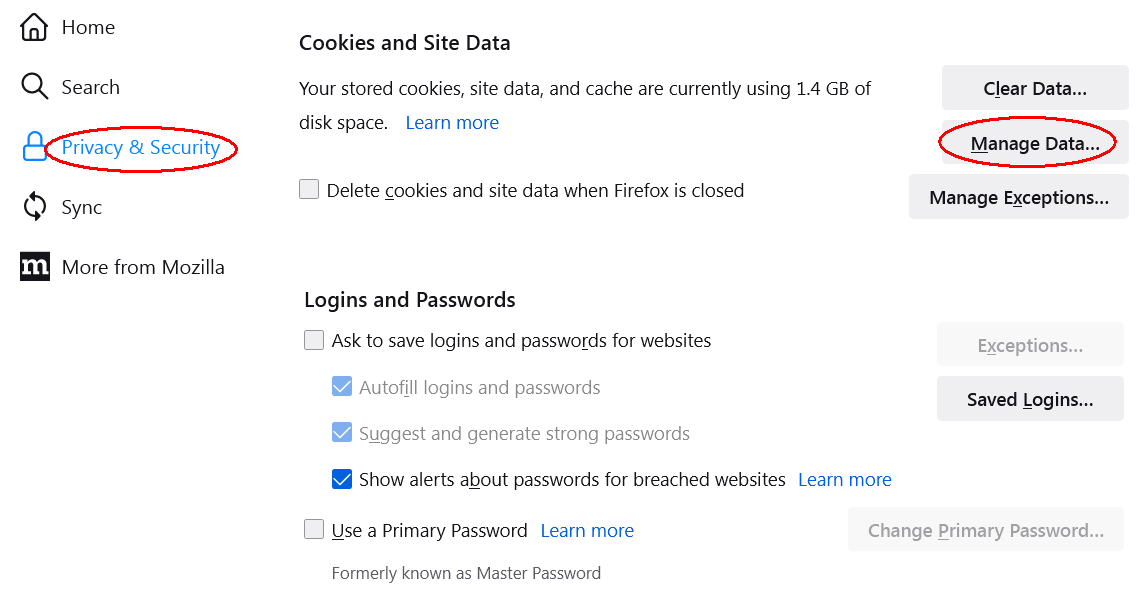
- Restart the Browser:
- After adjusting the security settings, restart your browser and check NSIPS for connection issues.
Method 4: Check System Date and Time
Incorrect date and time settings can cause SSL certificate verification failures, leading to the NSIPS Secure Connection Failed error.
Steps to Adjust Date and Time
- Open Date and Time Settings:
- In Windows, right-click the time on your taskbar and select Adjust date/time.
- On macOS, go to System Preferences > Date & Time.
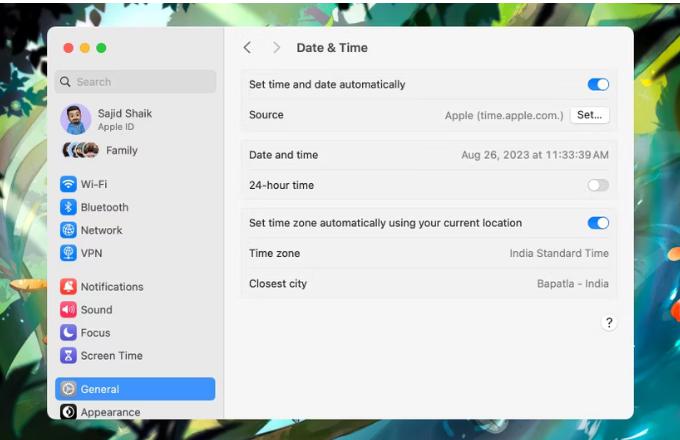
- Enable Automatic Date and Time:
- Toggle the option to Set time automatically. This ensures your system is synchronized with an online time server.
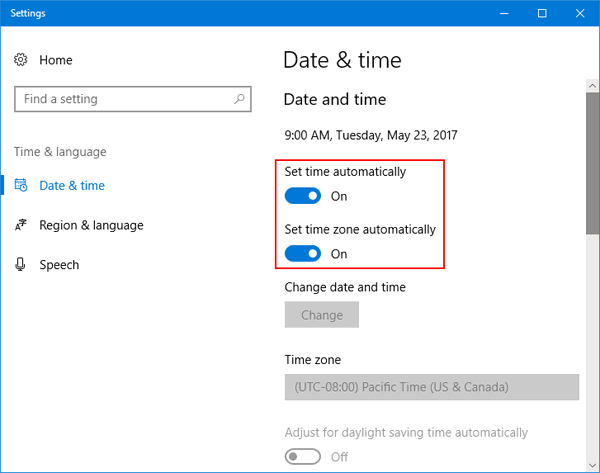
- Restart Your Computer:
- After correcting the date and time settings, restart your computer and attempt to access NSIPS again.
Method 5: Disable Firewall or Antivirus Interference
Overly aggressive antivirus or firewall settings might block NSIPS from establishing a secure connection.
Steps to Temporarily Disable Antivirus or Firewall
- Access Antivirus Settings:
- Open your antivirus program and locate the settings for real-time protection.
- Disable Web Shield or Real-Time Protection:
- Temporarily disable web protection or real-time protection. Note that this step should only be performed as a troubleshooting measure.
- Access NSIPS:
- Try accessing NSIPS again to see if the antivirus or firewall was the issue.
- Re-enable Protection:
- Remember to re-enable your antivirus or firewall after troubleshooting.
Conclusion
Encountering the NSIPS Secure Connection Failed error can be frustrating, but it’s usually related to SSL certificate issues, browser settings, or system configurations. By following the steps in this guide, you should be able to resolve the issue quickly and regain access to NSIPS. Make sure your browser is up-to-date, check for valid security certificates, adjust browser settings, and ensure your system’s time and date are correct.
If the problem persists after trying these solutions, consider reaching out to NSIPS support for further assistance.

