How to Resolve Slow File Explorer Performance on Windows 11
Windows 11 brings many new features and visual improvements, but some users have experienced slow performance when using File Explorer. This sluggishness can be frustrating, especially when managing files or folders. In this guide, we will explore various solutions to fix slow File Explorer performance on Windows 11. Whether you’re dealing with lagging, freezing, or slow loading times, these methods should help restore normal functionality.
Common Causes of File Explorer Slowing Down
Several factors can cause File Explorer to run slowly on Windows 11, including:
- Too many background processes.
- Corrupt system files.
- Large folders with many files.
- Outdated software or drivers.
- File indexing issues.
Understanding the potential causes can help you find the right solution.
Solution 1: Restart File Explorer

Sometimes, restarting File Explorer can fix temporary glitches that cause it to slow down.
Steps to Restart File Explorer:
- Press Ctrl + Shift + Esc to open the Task Manager.
- Scroll down and find Windows Explorer.
- Right-click on Windows Explorer and select Restart.
Restarting the explorer process should refresh the system and potentially fix performance issues.
Solution 2: Clear File Explorer History

File Explorer keeps track of your recent searches and file accesses. Over time, this history can slow down the application. Clearing the history can help improve performance.
Steps to Clear File Explorer History:
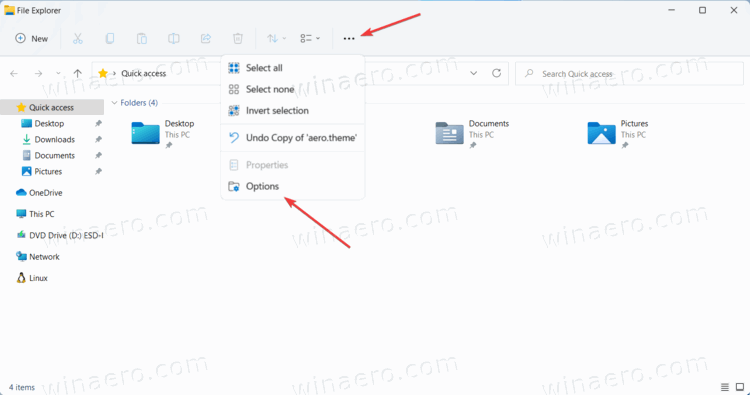
- Open File Explorer and click on the three dots in the top-right corner of the window.
- Select Options from the drop-down menu.
- In the General tab, find the Privacy section.
- Click Clear to remove File Explorer history.
Clearing the history should help speed up File Explorer if the issue is related to accumulated data.
Solution 3: Disable Quick Access
By default, File Explorer opens to Quick Access, which shows your most recent files and frequently used folders. Disabling Quick Access might improve the speed of File Explorer.
Steps to Disable Quick Access:
- Open File Explorer and click on the three dots in the top-right corner.
- Choose Options from the drop-down menu.
- In the General tab, change Open File Explorer to from Quick Access to This PC.
- Click Apply and then OK to save changes.
Now, File Explorer will open directly to This PC, which can load faster.
Solution 4: Optimize Folders for General Items

Sometimes, folders with large files or mixed content types can slow down File Explorer. Optimizing folders for general items can help speed things up.
Steps to Optimize Folders:
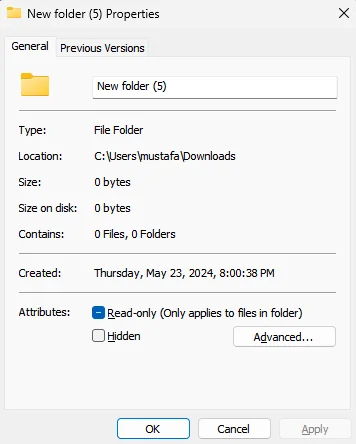
- Right-click on the folder that’s loading slowly and select Properties.
- Go to the Customize tab.
- Under Optimize this folder for, choose General items.
- Click Apply and OK to save changes.
This optimization can help reduce the load time for folders containing many files.
Solution 5: Disable Search Indexing for Specific Locations
File Explorer uses Windows Search indexing to improve search speeds, but if the indexing database becomes corrupted, it can slow down your system. Disabling indexing for specific folders or drives may help.
Steps to Disable Indexing:
- Press Windows + E to open File Explorer.
- Right-click on the drive or folder where File Explorer is running slow and select Properties.
- Under the General tab, uncheck Allow files on this drive to have contents indexed.
- Click Apply and OK.
This method may slightly reduce search functionality but can boost overall File Explorer performance.
Solution 6: Run System File Checker (SFC)

Corrupted system files can also slow down File Explorer. Running a System File Checker (SFC) scan can repair these files.
Steps to Run SFC Scan:
- Press Windows + S, type cmd, and select Run as administrator under Command Prompt.
- In the command prompt window, type:
bash
sfc /scannow
- Press Enter and wait for the process to complete. The tool will scan for and repair any corrupted system files.
Solution 7: Disable Visual Effects for Better Performance
Visual effects in Windows 11 can make your system look smoother but might slow down File Explorer performance on less powerful machines.
Steps to Disable Visual Effects:
- Press Windows + I to open Settings.
- Go to System > About.
- On the right, click Advanced system settings.
- Under the Performance section, click Settings.
- Choose Adjust for best performance.
- Click Apply and OK.
Disabling these effects should result in a noticeable speed boost in File Explorer and other applications.
Conclusion
Slow File Explorer performance on Windows 11 can be caused by a variety of issues, from system file corruption to unnecessary visual effects. By following the steps outlined in this guide, you can resolve most performance problems and get File Explorer running smoothly again. Whether it’s clearing history, adjusting settings, or running system checks, these solutions will help ensure a faster and more responsive experience.
