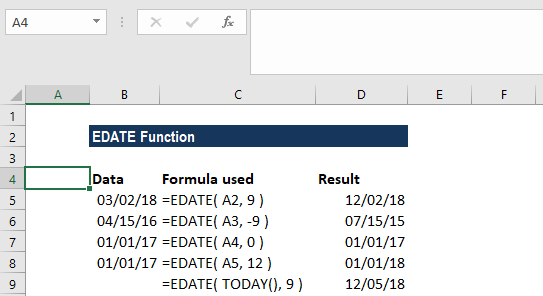
Guide to Using the EDATE Function in Excel
The EDATE function in Excel is a powerful tool that allows you to calculate a date that is a specified number of months before or after a given date. It’s particularly useful for handling date-based calculations such as financial projections, scheduling, or creating time-based reports.
In this article, we will guide you through understanding how the EDATE function works, its syntax, and how you can apply it in practical scenarios.
What Is the EDATE Function in Excel?

The EDATE function returns the date that is a specified number of months before or after a given start date. It is often used to calculate due dates, maturity dates for financial instruments, and scheduling future events based on a current date.
EDATE Function Syntax
The syntax for the EDATE function is simple:
=EDATE(start_date, months)
- start_date: This is the initial date from which you want to calculate.
- months: This represents the number of months you want to add (or subtract, if using a negative value) from the start date.
Using the EDATE Function in Excel: A Step-by-Step Guide
Example 1: Basic Usage to Add Months to a Date
Let’s say you have a start date of January 15, 2024, and you want to know what the date will be 6 months later.
- In a cell, enter the following formula:
scss
=EDATE("15-Jan-2024", 6)
- Excel will return the result: 15-Jul-2024.
This example shows how the EDATE function easily calculates a future date by adding months to the start date.
Example 2: Subtracting Months from a Date
You can also subtract months from a date using a negative value for the months parameter. Suppose you want to find the date 3 months before March 10, 2024.
- Enter the following formula:
scss
=EDATE("10-Mar-2024", -3)
- Excel will return the result: 10-Dec-2023.
This demonstrates how EDATE can work in reverse to calculate a past date.
Example 3: Using Cell References in the EDATE Function
Instead of hardcoding dates directly into the formula, you can refer to a cell that contains the date. This makes your worksheet more dynamic and easier to update.
- Enter 15-Jan-2024 in Cell A1.
- In Cell B1, enter the formula:
scss
=EDATE(A1, 12)
- Excel will return 15-Jan-2025, which is 12 months (1 year) after the date in Cell A1.
Using cell references like this ensures that any updates to the date in A1 will automatically adjust the calculation in B1.
Practical Applications of the EDATE Function
1. Financial Projections
The EDATE function is often used in financial forecasting to project due dates for payments, loan schedules, or investment maturities. For example, you can calculate when a loan will be paid off or when an investment matures by using EDATE to calculate future dates based on a specific timeline.
Example:
If a loan payment is due every 6 months, you can use EDATE to calculate the next due date. If the first payment is due on 15-Jan-2024, the formula:
=EDATE("15-Jan-2024", 6)
will return 15-Jul-2024.
2. Scheduling and Project Management
For project management, you may need to schedule tasks or milestones that occur at regular intervals (e.g., every month or quarter). The EDATE function helps automate these calculations, reducing manual errors and ensuring consistency.
Example:
You can create a timeline for a project that begins on 01-Feb-2024 and set milestones every three months. The formula:
=EDATE("01-Feb-2024", 3)
will return 01-May-2024.
3. Managing Subscriptions or Contracts
If you manage subscriptions, leases, or contracts that renew at fixed intervals (e.g., yearly or bi-annually), EDATE can help track renewal dates.
Example:
If a contract is set to renew every 12 months starting from 01-Mar-2023, the formula:
=EDATE("01-Mar-2023", 12)
will return 01-Mar-2024 for the next renewal date.
Common Issues with the EDATE Function
- Invalid Date Formats: If the date provided is not in a valid format recognized by Excel, you will get an error. Always ensure the date is formatted correctly, either as a date value or using text like
"15-Jan-2024". - Non-Date Values: If the start date is not a valid date, Excel will return a
#VALUE!error. Ensure that the start date is a valid date value or properly formatted text.
Conclusion
The EDATE function is a simple yet powerful tool for managing date-based calculations in Excel. Whether you’re tracking payments, scheduling tasks, or managing contracts, EDATE helps you easily calculate future or past dates by adding or subtracting months. By incorporating this function into your workflow, you can streamline your date management and avoid manual errors.
Understanding how to apply the EDATE function in Excel will help you manage time-sensitive data more effectively, making it an essential tool for anyone working with dates regularly.
