Fixed: Windows Updates Continuously Disabling Themselves
Windows Updates are crucial for keeping your system secure, stable, and up-to-date with the latest features and improvements. However, if your Windows Updates keep turning off automatically, it can leave your system vulnerable to security threats and software bugs. This issue can arise due to various reasons, including corrupted system files, incorrect settings, or interference from third-party software. In this guide, we’ll explore several methods to fix the problem and ensure that Windows Updates stay enabled.
Understanding the Issue
Why Do Windows Updates Keep Turning Off?
There are several reasons why Windows Updates might keep turning off:
- Corrupted or missing system files: Essential files required for the Windows Update service may be corrupted or missing, causing the service to stop.
- Incorrect Windows Update settings: Settings may be configured incorrectly, leading to automatic disabling of updates.
- Third-party software interference: Some antivirus or system optimization tools can disable Windows Updates to prevent changes to the system.
- Group Policy settings: On Windows 10 Pro and Enterprise, Group Policy settings may be configured to disable updates.
How to Fix Windows Updates Turning Off
If your Windows Updates keep turning off, try the following methods to resolve the issue.
1. Restart the Windows Update Service

Restarting the Windows Update service can help resolve temporary glitches that might be causing the updates to turn off.
Steps:
- Open the Run Dialog:
- Press Win + R to open the Run dialog box.
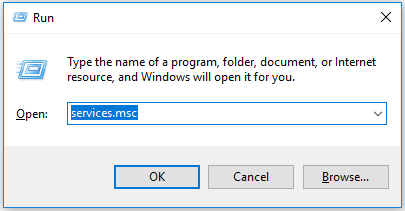
- Type services.msc:
- Type
services.mscand press Enter to open the Services window.
- Type
- Locate Windows Update:
- Scroll down and find Windows Update in the list of services.
- Restart the Service:
- Right-click on Windows Update and select Restart. If the service is not running, select Start.
- Set Startup Type to Automatic:
- Right-click on the service, select Properties, and set the Startup type to Automatic.
- Click OK to save the changes.
- Check for Updates:
- Go to Settings > Update & Security > Windows Update and check for updates.
2. Run the Windows Update Troubleshooter

The Windows Update Troubleshooter is a built-in tool that can detect and automatically fix common issues related to Windows Update.
Steps:
- Open Settings:
- Press Win + I to open Settings.
- Navigate to Update & Security:
- Go to Update & Security > Troubleshoot.
- Run the Troubleshooter:
- Click on Additional troubleshooters, then select Windows Update and click Run the troubleshooter.
- Follow the On-Screen Instructions:
- The troubleshooter will scan for issues and attempt to fix them automatically.
- Restart Your Computer:
- After the troubleshooter completes, restart your computer and check if Windows Updates stay on.
3. Check Group Policy Settings (For Windows 10 Pro and Enterprise)

If you are using Windows 10 Pro or Enterprise, Group Policy settings might be configured to turn off Windows Updates. Changing these settings can help.
Steps:
- Open the Run Dialog:
- Press Win + R to open the Run dialog box.
- Type gpedit.msc:
- Type
gpedit.mscand press Enter to open the Group Policy Editor.
- Type
- Navigate to Windows Update Settings:
- Go to Computer Configuration > Administrative Templates > Windows Components > Windows Update.
- Check the Configure Automatic Updates Policy:
- Double-click on Configure Automatic Updates and set it to Not Configured or Enabled.
- Apply the Changes:
- Click Apply and then OK to save the changes.
- Restart Your Computer:
- Restart your computer and check if Windows Updates stay on.
4. Use the Registry Editor

If the Group Policy Editor is not available, you can use the Registry Editor to make changes to the Windows Update settings.
Steps:
- Open the Run Dialog:
- Press Win + R and type
regeditto open the Registry Editor.
- Press Win + R and type
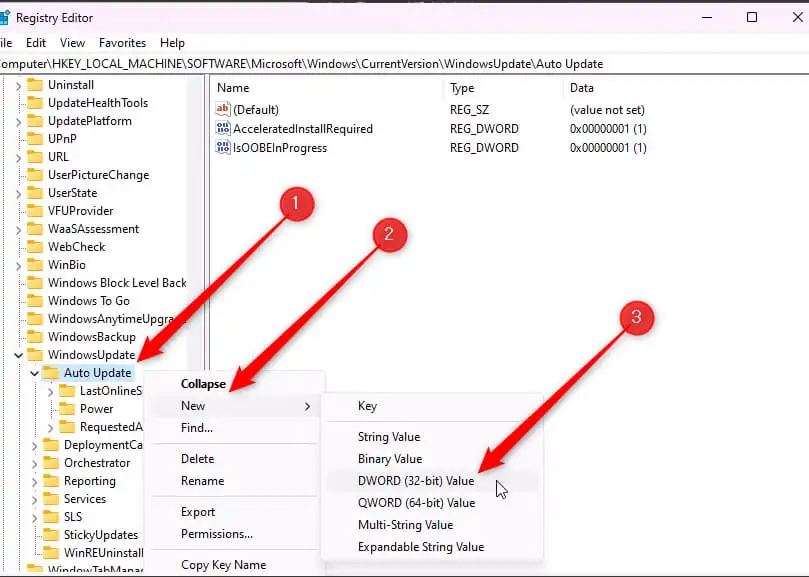
- Navigate to Windows Update Key:
- Go to the following path:
HKEY_LOCAL_MACHINE\SOFTWARE\Policies\Microsoft\Windows\WindowsUpdate\AU
- Go to the following path:
- Modify the AUOptions Key:
- If you see a key named AUOptions, right-click on it and select Delete. This will reset the update settings.
- Restart Your Computer:
- After making these changes, restart your computer and check if Windows Updates stay on.
5. Check for Malware and Viruses

Malware and viruses can interfere with system settings, including Windows Update. Running a full system scan with your antivirus software can help detect and remove any malicious software.
Steps:
- Open Your Antivirus Program:
- Launch the antivirus software installed on your computer.
- Run a Full System Scan:
- Choose the option to perform a full system scan and allow the software to scan your computer for threats.
- Remove Any Detected Threats:
- Follow the prompts to quarantine or remove any detected malware or viruses.
- Restart Your Computer:
- After the scan and removal process is complete, restart your computer and check if Windows Updates stay on.
Conclusion
If Windows Updates keep turning off, it can prevent your system from receiving critical security updates and new features. However, by restarting the Windows Update service, running the Windows Update troubleshooter, checking Group Policy settings, using the Registry Editor, and checking for malware, you can usually resolve the issue and keep Windows Updates enabled. Regular system maintenance and keeping your system updated can help prevent similar issues in the future.
