Permission Denied: You Are Not Authorized to Access This Server
Encountering the “Access Denied, You Don’t Have Permission To Access on This Server” error can be frustrating, especially when trying to access important websites. This guide provides several methods to troubleshoot and resolve this issue effectively.
Understanding the Error
The “Access Denied” error typically indicates that your browser or device is being blocked from accessing a specific server. This can be due to various reasons, including network issues, browser settings, or server-side restrictions.
1. Clear Browser Cache and Cookies
Clearing your browser’s cache and cookies can resolve many browsing issues.
Steps:
- Open your browser (e.g., Google Chrome).
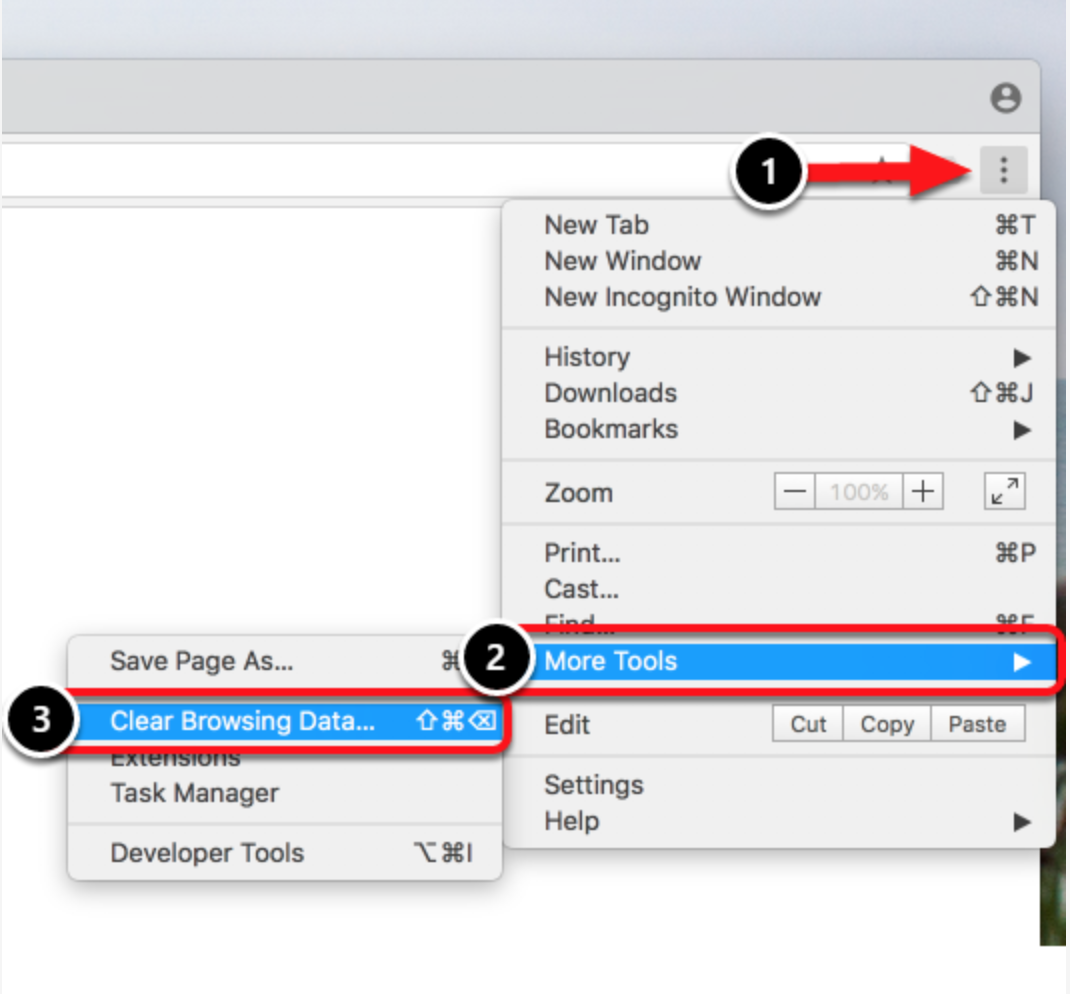
- Click on the three dots in the upper-right corner and go to More tools > Clear browsing data.
- Select All time in the time range dropdown.
- Check Cookies and other site data and Cached images and files.
- Click Clear data.
2. Disable VPN or Proxy
Sometimes, VPNs or proxy servers can cause access issues. Disabling them can help.
Steps:
- Open Settings > Network & Internet.
- Click on VPN and disable any active VPN connections.
- Go to Proxy and ensure Use a proxy server is turned off.

3. Reset Browser Settings
Resetting your browser to its default settings can fix misconfigurations.
Steps:
- Open your browser (e.g., Google Chrome).
- Click on the three dots in the upper-right corner and go to Settings.
- Scroll down and click Advanced.
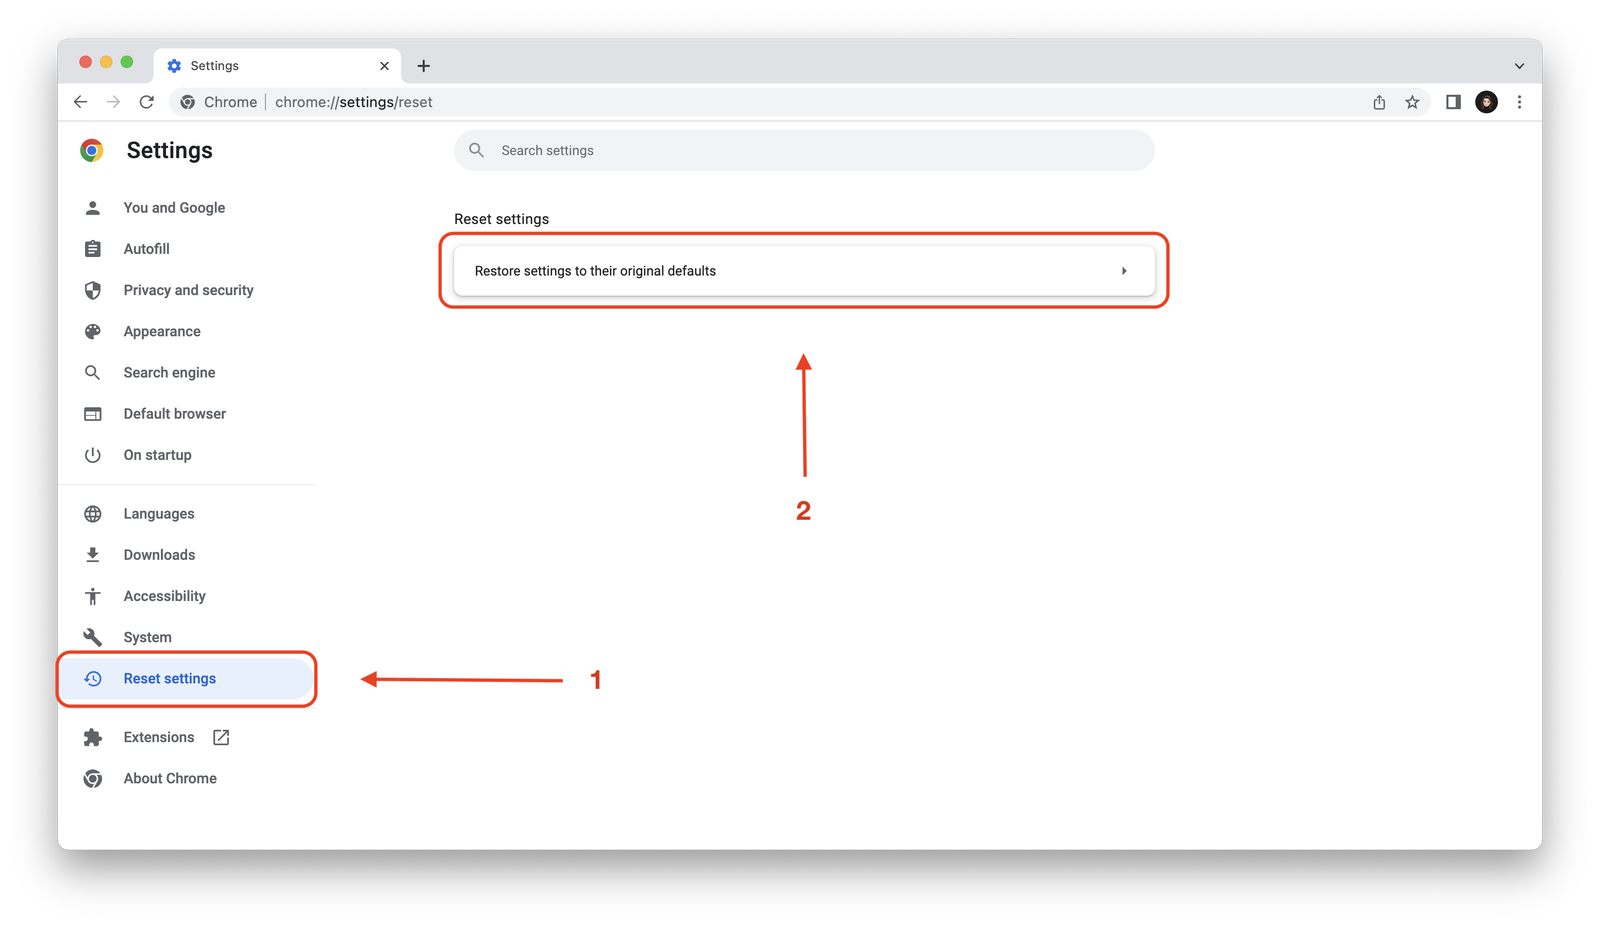
- Under the Reset and clean up section, click Restore settings to their original defaults.
- Confirm by clicking Reset settings.
4. Flush DNS Cache
Flushing the DNS cache can resolve DNS-related issues that might cause the error.
Steps:
- Open Command Prompt as an administrator: Press Win + X and select Command Prompt (Admin).
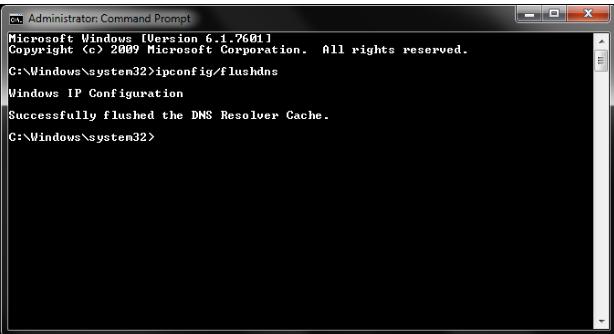
- Type
ipconfig /flushdnsand press Enter. - You should see a confirmation message.
5. Change DNS Servers
Switching to a public DNS server can resolve issues related to your current DNS provider.
Steps:
- Press Win + R, type ncpa.cpl, and press Enter to open Network Connections.
- Right-click your active network connection and select Properties.
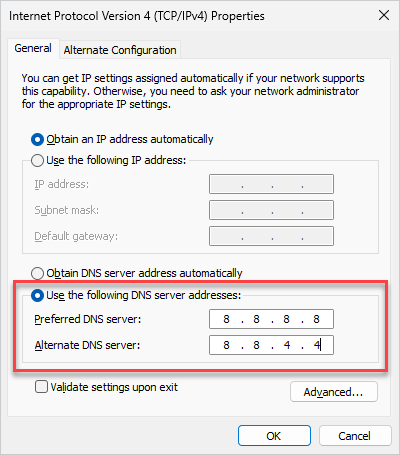
- Select Internet Protocol Version 4 (TCP/IPv4) and click Properties.
- Choose Use the following DNS server addresses and enter:
- Preferred DNS server:
8.8.8.8 - Alternate DNS server:
8.8.4.4
- Preferred DNS server:
- Click OK and restart your computer.
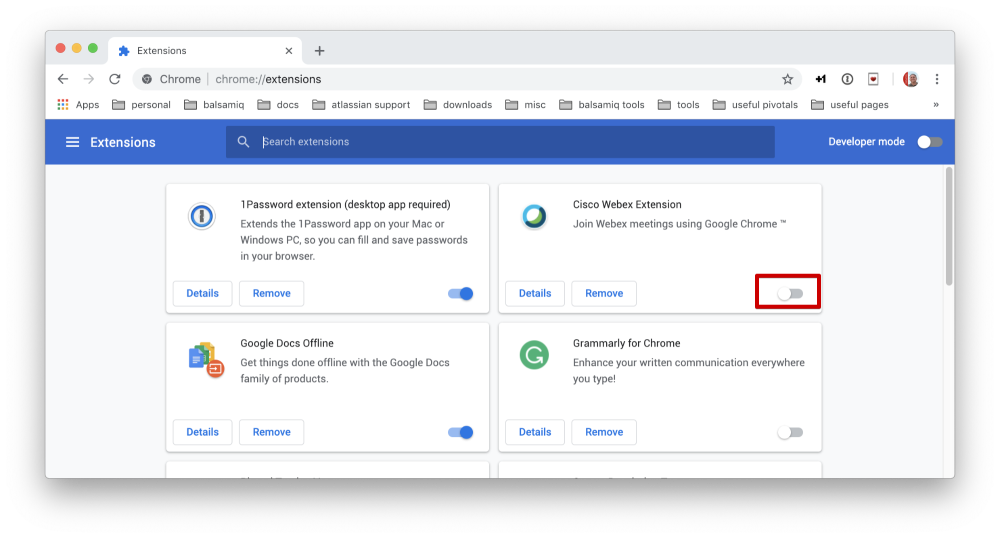
6. Disable Browser Extensions
Some browser extensions can interfere with accessing certain websites. Disabling them can help.
Steps:
- Open your browser (e.g., Google Chrome).
- Click on the three dots in the upper-right corner and go to More tools > Extensions.
- Toggle off all extensions.
- Restart your browser and check if the issue is resolved.
7. Try a Different Browser
If the issue persists, try accessing the website using a different browser.
Popular Browsers:
- Google Chrome
- Mozilla Firefox
- Microsoft Edge
8. Check Website Permissions
Ensure that the website is not blocking your IP address or location.
Steps:
- Contact the website’s support team to check if your IP address is blocked.
- If using a VPN or proxy, try accessing the site without it.
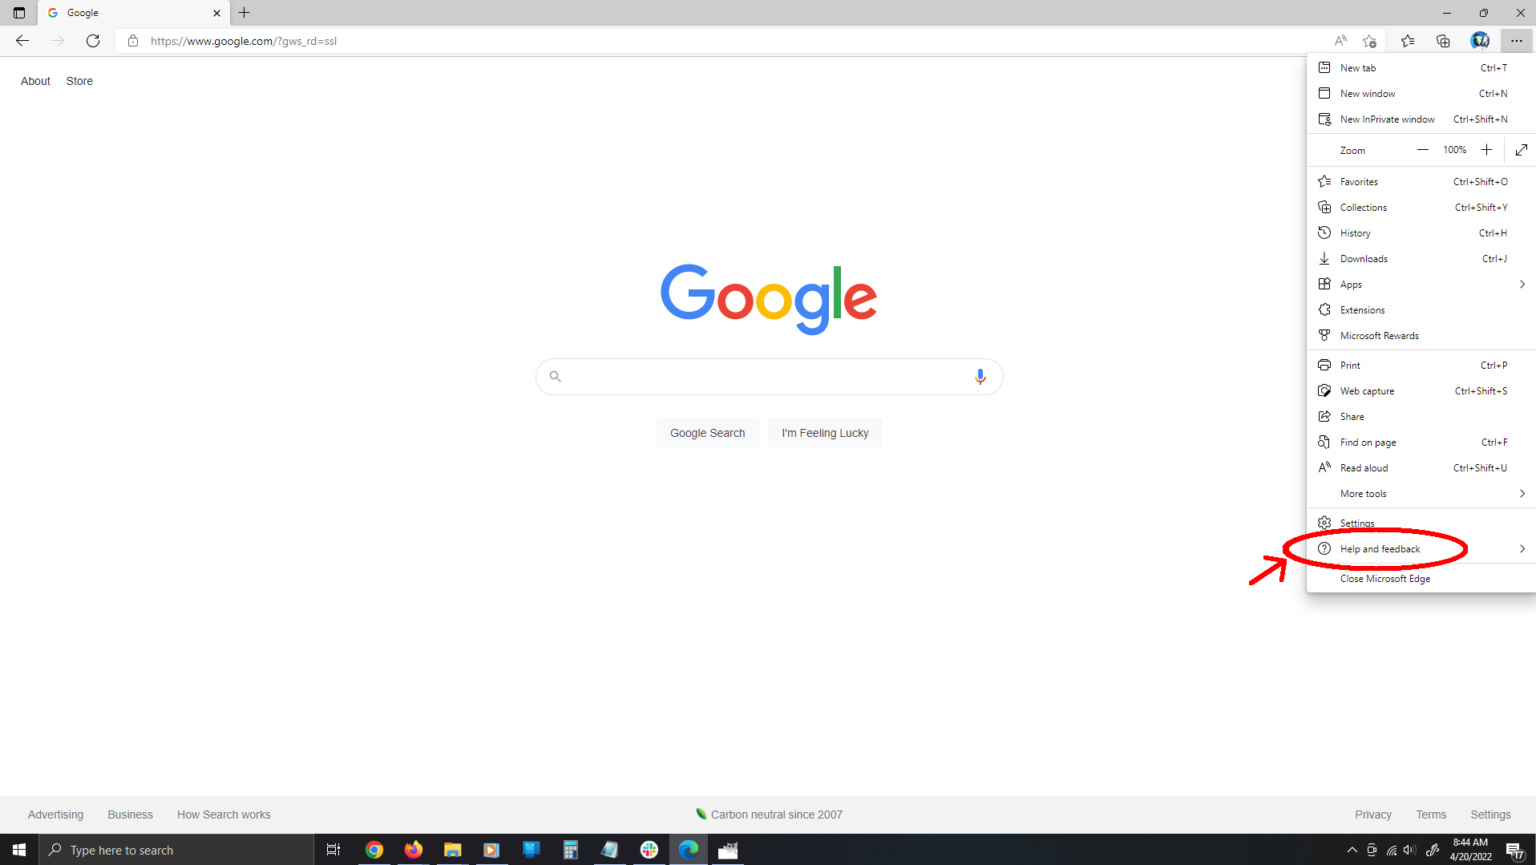
9. Update Your Browser
Keeping your browser up-to-date ensures compatibility and security.
Steps:
- Open your browser (e.g., Google Chrome).
- Click on the three dots in the upper-right corner and go to Settings.
- Click About Chrome to check for updates.
- Install any available updates and restart your browser.
Conclusion
By following these steps, you should be able to resolve the “Access Denied, You Don’t Have Permission To Access on This Server” error. Regular maintenance, such as keeping your browser and system updated, and managing your network settings, can help prevent such issues in the future.

